
Building a custom fishing rod is a rewarding and satisfying experience for any angler. Not only does it allow you to create a rod that is tailored to your specific needs and preferences, but it also gives you a deeper understanding of the components and mechanics of a fishing rod. While it may seem daunting at first, with the right tools and guidance, building your own custom fishing rod can be a fun and fulfilling project.
Before beginning the process of building a custom fishing rod, it is important to understand the basic components of a fishing rod. A fishing rod consists of several parts, including the rod blank, handle, reel seat, reel, guides, and thread. The rod blank is the main body of the rod and is typically made of graphite or fiberglass. The handle is where the angler holds the rod, and the reel seat is where the reel is attached to the rod. The guides are the circular pieces that run along the length of the rod and help guide the fishing line, while the thread is used to wrap the guides onto the rod blank. With a solid understanding of these components, an angler can begin the process of building their own custom fishing rod.
Assembling Your Custom Fishing Rod
Preparing the Rod Blank
Preparing the rod blank is an important step in building a custom fishing rod. To start, use a fine-grit sandpaper to remove any protective coating or residue from the blank. Gently sand the surface, ensuring a smooth and clean finish.
After sanding, clean the blank with a damp cloth to remove any dust or debris. This step ensures that the blank is free from any particles that could interfere with the adhesion of the rod components. Allow the blank to air dry completely before moving on to the next step.
Once the blank is dry, it’s time to mark the spine. The spine is the side of the blank that is most flexible and should face upwards when casting. To find the spine, gently flex the blank and observe which side bends the most. Mark this side using a pen or marker.
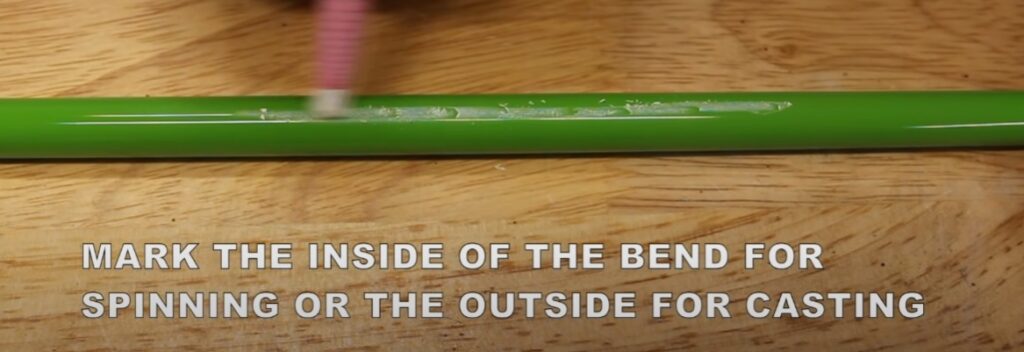
Marking the spine is crucial as it helps align the guides and reel seat for optimal performance. It ensures that the rod is properly loaded during casting, allowing for accurate and efficient energy transfer. By aligning the spine correctly, you’ll achieve better casting distance and control.
Taking the time to prepare the rod blank properly sets the foundation for a well-built custom fishing rod. It ensures a clean and smooth surface for the attachment of rod components and helps optimize the rod’s performance. With a properly prepared blank, you’re ready to move on to the next steps of assembling your custom fishing rod.
Attaching the Handle and Reel Seat
After preparing the rod blank, the next step in building a custom fishing rod is attaching the handle and reel seat. To begin, apply a good amount of epoxy to the end of the blank where the reel seat will be positioned. Then, carefully slide the reel seat onto the blank, making sure it is aligned with the spine mark.

(Make sure to wipe off excess epoxy)
Sometimes the handle and or reel seat may not be the exact correct hole size, so sometimes it is necessary to drill through them with the correct sized drill bit, or use a reamer to get a perfect fit, so be aware of this when designing your rod.
Once the reel seat is in place, allow the epoxy to dry completely according to the manufacturer’s instructions. It’s important to ensure that the reel seat is securely bonded to the blank before proceeding.
After the epoxy has dried, it’s time to attach the handle. Apply a small amount of epoxy to the end of the reel seat where the handle will be mounted. Carefully slide the handle onto the reel seat, aligning it with the spine mark on the blank.
Ensure that the handle is positioned securely and allow the epoxy to dry completely. This step is crucial as it ensures a strong and stable connection between the handle and reel seat.
By properly attaching the handle and reel seat, you create a solid foundation for your custom fishing rod. The alignment with the spine mark helps optimize the rod’s performance during casting and fishing. Once the epoxy has fully cured, you can move on to the next step of installing the guides.
Installing the Guides
After the handle and reel seat are in place, it’s time to install the guides. Start by placing the tip-top guide on the end of the blank and securing it with a small amount of epoxy. Then, space out the remaining guides along the blank according to your desired configuration.
Once the guides are in place, wrap thread around the base of each guide to secure it to the blank. Use a thread tensioner to ensure the wraps are tight and even.
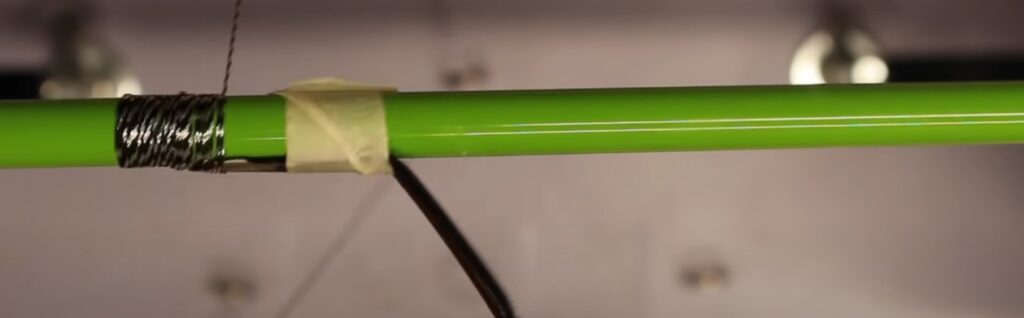
Once the guides are in place on the fishing rod blank, it’s important to secure them properly for optimal performance. To do this, start by wrapping thread around the base of each guide to secure it to the blank. Use a thread tensioner to ensure the wraps are tight and even.
Begin by tying an initial thread wrap at the base of the guide foot. Then, wrap the thread tightly around the blank, moving away from the guide foot and towards the tip of the rod. Continue making wraps, spacing them evenly and overlapping each wrap slightly for added strength.
As you wrap the thread, use a thread tensioner to maintain consistent tension and ensure a neat and uniform appearance. Adjust the tensioner as needed to achieve the desired tightness of the wraps.
Once you reach the desired length, tie off the thread with a finishing knot and secure it with a small amount of epoxy. This will further strengthen the wraps and ensure they stay in place.
Repeat this process for each guide along the rod blank, ensuring they are spaced according to your desired configuration. It’s important to maintain proper alignment and spacing to ensure smooth line flow during casting and retrieval. Once the guide has been glued, use a sootless flame to melt the glue slightly for optimal strength.
After all the guides are wrapped and secured, inspect the wraps for any loose or uneven areas. Make any necessary adjustments and apply additional epoxy if needed. Allow the epoxy to dry according to the manufacturer’s instructions before proceeding to the next steps of finishing your custom fishing rod.
Taking the time to properly install and wrap the guides will contribute to the overall performance and longevity of your custom fishing rod. It ensures that the guides are securely attached and aligned, allowing for smooth line flow and efficient casting.
Attaching the Reel
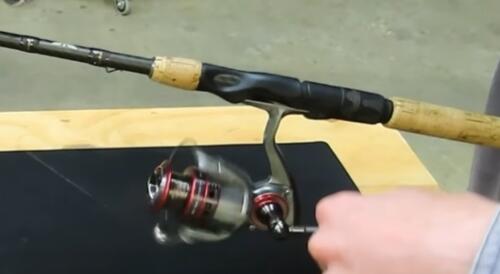
Once the guides are securely in place, the next step in building a custom fishing rod is attaching the reel to the reel seat. To begin, slide the reel onto the reel seat, ensuring that it aligns properly with the seat’s mounting holes. Take note of the reel’s orientation and ensure that it is centered and balanced on the rod.
Once the reel is positioned correctly, tighten the reel seat’s locking mechanism to secure the reel in place. It’s important to ensure a snug fit without overtightening, as this can lead to damage or misalignment.
Take a moment to double-check the alignment and balance of the reel. If necessary, make any adjustments to the reel seat to achieve proper alignment and ensure that the weight distribution feels comfortable and balanced in your hand.
Lastly, give the reel seat and reel a final check to ensure that everything is securely fastened. A properly attached reel will provide stability and optimal performance during your fishing adventures.
Applying the Finish
The final step in assembling your custom fishing rod is to apply the finish. This will protect the thread wraps and give the rod a polished look.
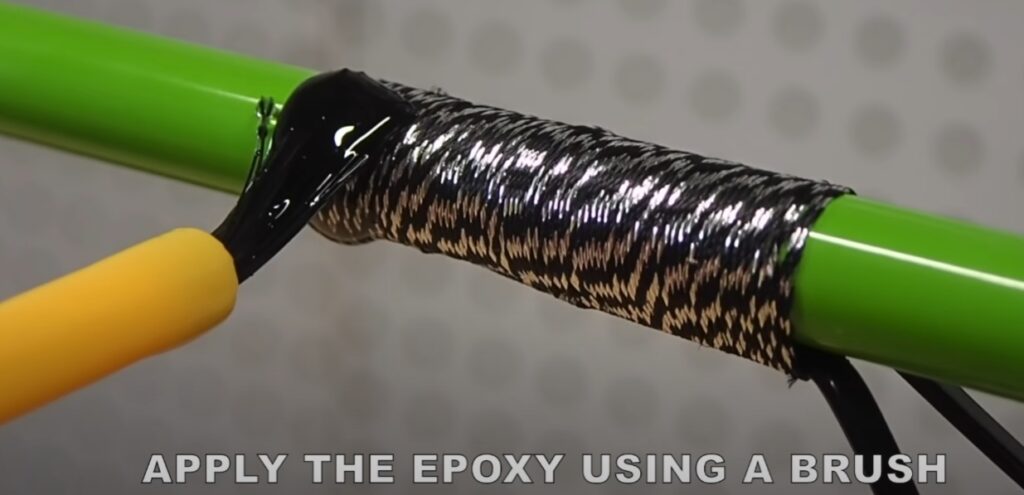
Apply a thin coat of epoxy to the thread wraps, making sure to cover the entire area. Use a brush to spread the epoxy evenly and remove any air bubbles.
Let the epoxy dry completely according to the manufacturer’s instructions. Once it’s dry, apply a second coat for added durability.
With these steps, you can assemble your custom fishing rod with confidence and enjoy a personalized fishing experience.
Looking for the best rod enhancements to add to your rod? check out this guide here
How to Build a Custom Fishing Rod from Scratch
Building a custom fishing rod can be an enjoyable and rewarding experience for any angler. By building your own rod, you have the ability to create a fishing tool that is tailored to your specific needs and preferences. Whether you are a seasoned angler or just starting out, building your own rod can be a fun and educational process.
To get started, it is important to have a basic understanding of the components that make up a fishing rod. This includes the rod blank, guides, reel seat, handle, and other accessories. By selecting the right components and assembling them in the correct manner, you can create a fishing rod that is both functional and aesthetically pleasing. With the help of instructional videos and classes, anglers can learn the basics of rod building and gain the confidence to build their own custom fishing rod.
Understanding Fishing Rod Basics
Building a custom fishing rod can be a rewarding experience that results in a high-quality fishing rod that is tailored to your needs. Before diving into the process, it is important to understand the basic components of a fishing rod.
Rod Blanks
The rod blank is the main body of the fishing rod. It is typically made of graphite, fiberglass, or a combination of both materials. The blank determines the overall length, power, and action of the rod. Power refers to the rod’s ability to handle heavy loads, while action refers to the flexibility of the rod.
Guides
Guides are the small rings that are attached to the rod blank. They serve to guide the fishing line along the length of the rod and prevent it from rubbing against the blank. Guides come in different sizes and materials, and their placement on the rod can affect its performance.
Reel Seat
The reel seat is the component of the fishing rod that holds the reel in place. It is typically made of plastic or metal and can be attached to the rod blank using glue or screws. The size and shape of the reel seat will depend on the type of reel being used.
Handle
The handle of the fishing rod is where the angler grips the rod. It can be made of cork, foam, or other materials and can come in different shapes and lengths. The handle can affect the comfort and control of the rod, so it is important to choose one that feels right for you.
By understanding these basic components, anglers can begin to customize their fishing rod to their liking. The next step is to choose the right materials and components to build a rod that meets their specific needs.
Choosing the Right Materials
When building a custom fishing rod, choosing the right materials is crucial for the rod’s performance and longevity. Here are some key considerations for selecting the right materials:
Rod Blanks
Rod blanks are the foundation of any fishing rod. They come in various materials, including graphite, fiberglass, and composite. Graphite is the most popular choice due to its sensitivity, strength, and lightweight. However, fiberglass and composite blanks are more durable and can handle heavier fish.
When choosing a rod blank, consider the length, power, and action of the rod. Length determines the casting distance, power determines the rod’s strength, and action determines how the rod flexes.
Guides
Guides are the small metal loops that run along the length of the rod and hold the fishing line. They come in various sizes and materials, including ceramic, aluminum oxide, and silicon carbide. Ceramic guides are the most popular choice due to their durability and smoothness.
When selecting guides, consider the rod blank’s diameter, the fishing line’s weight, and the type of fishing you plan to do. The guide size should match the rod blank’s diameter, and the guide material should match the fishing line’s weight.
Reel Seats
Reel seats are the part of the rod that holds the fishing reel in place. They come in various materials, including plastic, aluminum, and graphite. Aluminum and graphite are the most popular choices due to their strength and lightweight.
When choosing a reel seat, consider the fishing reel’s size and weight. The reel seat should fit the fishing reel snugly and securely.
Handles
Handles are the part of the rod that the angler holds onto while fishing. They come in various materials, including cork, EVA foam, and rubber. Cork is the most popular choice due to its comfort and durability.
When selecting a handle, consider the length and thickness of the handle. The handle should fit comfortably in the angler’s hand and provide a secure grip.
Overall, choosing the right materials is essential for building a custom fishing rod that performs well and lasts a long time. By considering the rod blank, guides, reel seat, and handle, anglers can create a rod that meets their specific needs and preferences.
Tools Required for Building a Custom Fishing Rod
Building a custom fishing rod requires a few specialized tools to ensure that the rod is built to the highest quality. Here are some of the essential tools needed for building a custom fishing rod:
Rod Wrapping Equipment
Rod wrapping equipment is necessary for securing the guides and thread to the rod blank. Here are some of the essential rod wrapping equipment:
- Rod wrapping machine: A rod wrapping machine is used to rotate the rod blank while the thread is being applied. This ensures that the thread is applied evenly and tightly.
- Thread: High-quality thread is essential for building a custom fishing rod. The thread should be strong and durable to withstand the stress of fishing.
- Guides: Guides are used to guide the fishing line along the length of the rod. They come in different sizes and shapes, and the choice of guides depends on the type of fishing the rod will be used for.
- Guide wrapping thread: Guide wrapping thread is used to secure the guides to the rod blank. It should be strong and durable to ensure that the guides are held in place.
Epoxy Mixer
Epoxy is used for securing the guides and reel seat to the rod blank. Here are some of the essential epoxy mixing equipment:
- Epoxy mixer: An epoxy mixer is used to mix the epoxy resin and hardener together. It ensures that the epoxy is mixed thoroughly and evenly.
- Epoxy resin: Epoxy resin is used to secure the guides and reel seat to the rod blank. It should be strong and durable to withstand the stress of fishing.
- Hardener: Hardener is mixed with the epoxy resin to activate it. The amount of hardener used depends on the type of epoxy resin being used.
Drying Motor
A drying motor is used to rotate the rod while the epoxy is drying. This ensures that the epoxy is applied evenly and dries evenly. Here are some of the essential drying motor equipment:
- Drying motor: A drying motor is used to rotate the rod while the epoxy is drying. It ensures that the epoxy is applied evenly and dries evenly.
- Rod stand: A rod stand is used to hold the rod while it is being rotated by the drying motor. It should be sturdy and stable to ensure that the rod does not fall over during the drying process.
Overall, these tools are essential for building a custom fishing rod to ensure that the rod is built to the highest quality.
Assembling Your Custom Fishing Rod
Once you have selected and gathered all the necessary components for your custom fishing rod, it is time to assemble them. Here are the steps to follow:
Attaching the Handle
The first step is to attach the handle to the blank. The handle usually consists of a cork or foam grip and a butt cap. To attach the handle, follow these steps:
- Apply a small amount of epoxy to the end of the blank.
- Slide the grip onto the blank and align it with the mark you made during the fitting process.
- Apply a small amount of epoxy to the butt cap and slide it onto the end of the grip.
- Wipe off any excess epoxy and let it dry for at least 24 hours.
Securing the Reel Seat
The next step is to secure the reel seat to the blank. The reel seat is the component that holds the reel in place. To secure the reel seat, follow these steps:
- Apply a small amount of epoxy to the threads of the reel seat.
- Slide the reel seat onto the blank and align it with the mark you made during the fitting process.
- Tighten the reel seat by hand until it is snug against the grip.
- Wipe off any excess epoxy and let it dry for at least 24 hours.
Installing the Guides
The third step is to install the guides onto the blank. The guides are the components that help guide the line from the reel to the tip of the rod. To install the guides, follow these steps:
- Lay out the guides in the desired positions along the blank.
- Apply a small amount of epoxy to the foot of each guide.
- Place each guide onto the blank and align it with the mark you made during the fitting process.
- Adjust the position of each guide as necessary.
- Let the epoxy dry for at least 24 hours.
Wrapping the Guides
The final step is to wrap the guides onto the blank. Wrapping the guides helps to secure them in place and also adds a decorative touch to the rod. To wrap the guides, follow these steps:
- Cut a length of thread to wrap each guide.
- Tie the thread to the blank near the foot of the guide.
- Wrap the thread tightly around the guide and the blank, making sure to keep the wraps close together.
- Tie off the thread near the foot of the guide.
- Apply a small amount of epoxy to the wraps and let it dry for at least 24 hours.
By following these steps, you can assemble your custom fishing rod with ease. Remember to take your time and be patient, as rushing the process can lead to mistakes.
Finishing Touches
After building a custom fishing rod, the final step is to add the finishing touches that will make the rod look and perform its best. This section will cover two important sub-sections: Applying Epoxy Finish and Final Inspection.
Applying Epoxy Finish
Epoxy finish is the key ingredient to crystal-clear thread wraps in custom rod building. To ensure the perfect appearance of the final finish, it’s important to follow these steps:
- Mix the epoxy according to the manufacturer’s instructions.
- Apply the epoxy to the thread wraps using a brush or syringe.
- Use a heat gun or torch to remove any bubbles that may have formed in the epoxy.
- Allow the epoxy to cure for the recommended time.
It’s important to note that applying too much epoxy can add unnecessary weight to the rod, while applying too little can result in weak thread wraps. Finding the right balance is crucial to creating a high-quality finished product.
Final Inspection
Before the custom fishing rod is ready to use, it’s important to perform a final inspection to ensure that everything is in order. Here are a few things to check:
- Check the guides to make sure they are properly aligned and secure.
- Inspect the thread wraps for any loose or frayed ends.
- Check the reel seat and handle for any defects or damage.
- Test the rod’s action to make sure it performs as expected.
By performing a thorough final inspection, any potential issues can be caught and addressed before the rod is put to use. This will ensure that the custom fishing rod performs at its best and provides a great fishing experience.
Maintaining Your Custom Fishing Rod
After investing time and effort into building a custom fishing rod, it’s important to properly maintain it to ensure it lasts for years to come. Here are some tips for maintaining your custom fishing rod:
Cleaning
Cleaning your custom fishing rod after each use is essential to keep it in good condition. Use a soft cloth to wipe down the rod and reel, removing any dirt, sand, or saltwater that may have accumulated. Avoid using abrasive cleaners or scrubbers, as they can scratch the rod’s finish.
Storage
Proper storage is also crucial for maintaining your custom fishing rod. Always store your rod in a dry, cool place, away from direct sunlight. Consider using a rod holder or rack to keep it organized and prevent it from getting tangled or damaged.
Reel Maintenance
The reel is just as important as the rod, so be sure to maintain it as well. Clean and lubricate the reel regularly to keep it functioning properly. Check the drag system and make any necessary adjustments to ensure it’s working correctly.
Inspection
Regularly inspect your custom fishing rod for any signs of damage or wear. Check the guides for cracks or chips, and the rod blank for any signs of warping or bending. If you notice any issues, address them immediately to prevent further damage.
By following these tips, you can maintain your custom fishing rod and enjoy it for years to come.
If customizing your fishing gear interests you, these articles may further pique your curiosity: